

Want to learn how to Install LED Roof Lights on a Golf Cart?
Ryan Fenters is the founder of the popular YouTube Channel called Fentertainment. Ryan creates DIY videos of, in his own words… “dedicated to making, painting, building, modifying and fixing things…”
His golf-cart-related DIY videos are very informative and we thought it would be a good idea to transcribe them for you for Golf Carting Magazine and GolfCarts.org.
In the latest edition, Ryan Fenters shows us step-by-step how to install Bluetooth LED lights to a golf cart top.
Ryan Fenters:
What’s going on guys I’m Ryan Fenters and welcome back to the Fentertainment Channel.
Dream Color 5050 Addressable LED Lights
On today’s video we’re going to be lighting up our roof with some Dream Color 5050 Addressable LED lights. Stay tuned.

Unpacking the Box
So let’s unpack the box… This is the LED strip lights we will be using to line the top of the cart. We have a standard 110 to 12 volt power adapter, we have two bags of supports, we have a connection wire, we have our LED light controller.
The LED lights will plug into this harness and the 12-volt power will plug into the other side. We will download the App on our phone to be able to control the lights.
What makes these lights a little bit different from all the other lights is that these are “addressable LEDs”. What does that mean? These do not just flash red to blue to green but the lights actually chase each other throughout the strip.
Supplied in the kit is a 110 to 12-volt wall charger; however since this is a golf cart, we’re not going to be using the wall charger so we need to cut it.
Tip Positive or Tip Negative
That being said we need to make sure it’s going to be “tip positive” or “tip negative”.
Reading on here it says that it is “tip positive” but yours may be different though, if you don’t get the same exact kind. I’m going to show you how to check whether it’s “tip positive” or “negative”.
I’m going to go ahead and pull out about a foot of wire which is more than plenty and we’re going to cut it off. We can disregard the wall plug as we will not use it. After you cut the wires we need to strip them back.
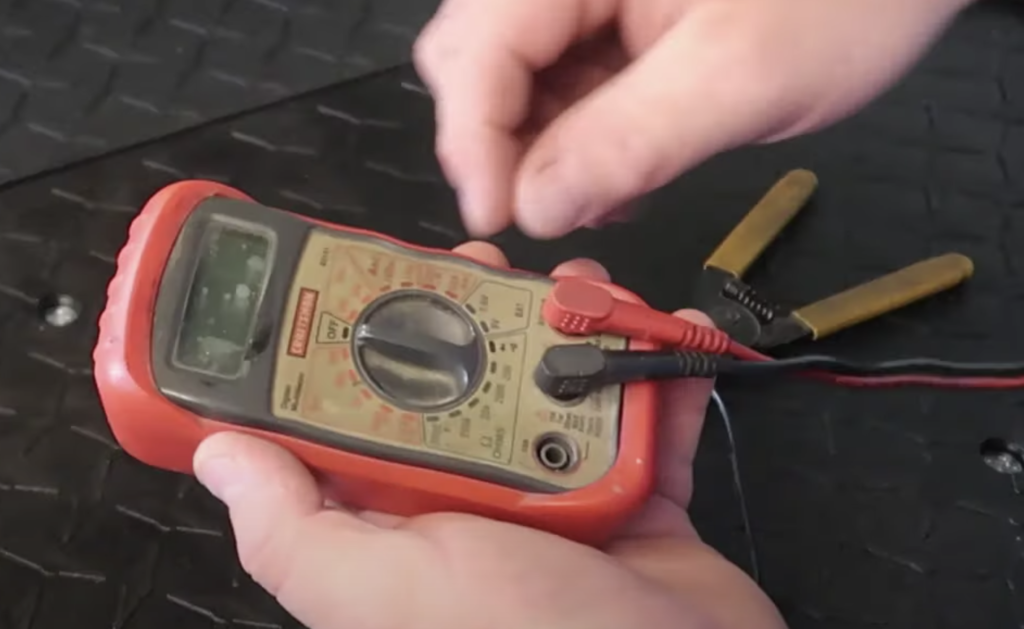
How do we know if it’s tip positive or tip negative? We need to take a multimeter here and turn it down to the “continuity settings”.
Once you press the two leads together, you’ll hear a beep and this is going to let us know whether this is “tip positive” or “tip negative”.
Simply take one of the leads of your multimeter and stick it inside the tip and connect the other lead to the wire and see each one is making contact there. (You’ll hear the beep.) So we know by doing this that the negative wire has the white stripe on it.
What makes our light kit easy to install is this Bazooka Party Bar G2 that I’ve already installed on this cart.
It has a switch on for an accessory output and it comes with a harness the harness that is built into the main harness and once we hit the switch power it will power any accessory and that includes this LED light kit.

Mounting the LED Lights
We have a couple of different spots where we can mount the LED lights. We can mount this on the bevel or we can mount it on the side of the aluminum track. Or we can mount it on the side of the top itself.
I’m first going to take some 91% isopropyl alcohol and use to really clean these side pieces as we don’t want any contaminants on the top because the backing of the LED strips is what’s going to make it stick to the top.
So off-camera I went ahead and soldered my leads and used heat shrink to go from the plug of the bazooka party bar G2 to the LED lights and also added some Velcro that will go between the LED Bluetooth controller and the frame.
We will clean this off with a little bit of alcohol and stick the controller up there before we start laying our lights. We need to clean up these wires with a split loom and make it look nice and neat.
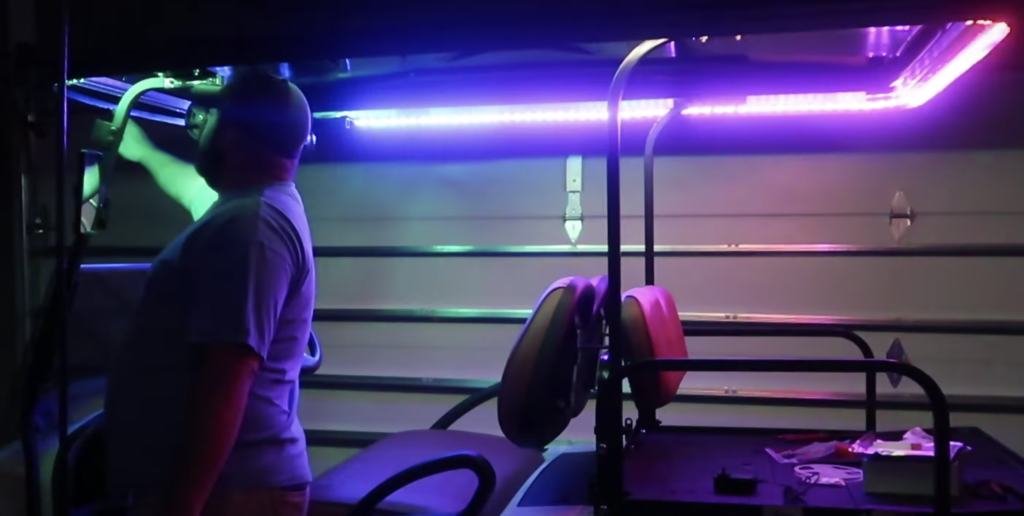
Once all the wires are in place and looking good, let’s get these LEDs mounted by just running them on the side of the lip here of the roof.
I have wires coming out of the controller going to the LEDs on the top and we just need to throw some wire loom on that and clean it up a little bit better. And I think it looks pretty good.

The App
I went searching for the App on my phone and we’re going to use one called LED Hue.
It is going to ask you to turn on your Bluetooth and once you have Bluetooth turned on you can select the option of SP110E. Once it is connected, it’ll show a blue check mark we can hit “Enter”.
You have over a hundred different color and variations you can choose from. You can change the speed, change the brightness, you can set manual colors as well. My favorite setting is the red and blue chasing. I don’t know why but I think it looks pretty cool.
I didn’t put any LED lights across the front of the cart. The one, five meter roll just went around both sides and the back, which is great because we don’t want any lights blinding us while we are driving.
I like that these lights are “dream color”, meaning they are color chasing color rather than one color fading into another color.
They are a little bit more expensive than the regular LED lights, but in my opinion, they’re totally worth it and it’s going to make the golf cart stand out.
There’s a ton of different variations on this App and you can just find the one that you like. There’s all kinds of things you can do.


